 |  |  | Bloxorz |
Bloxorz
In this project we implement the Bloxorz game. The goal of the game is to move a little block of size 1x1x2 units by toppling and rolling it over a terrain with a complex shape. When the block falls off the terrain, you lose (and have to start the same level again).Here is an example, with the block "standing" in its start position. The hole in the terrain is the target position.
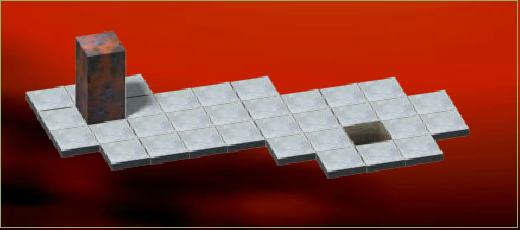
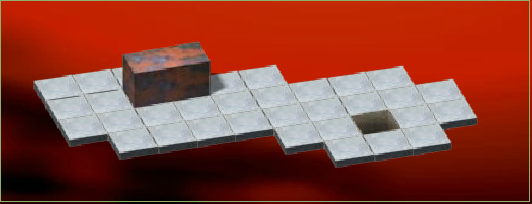
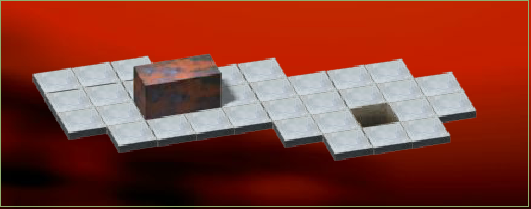
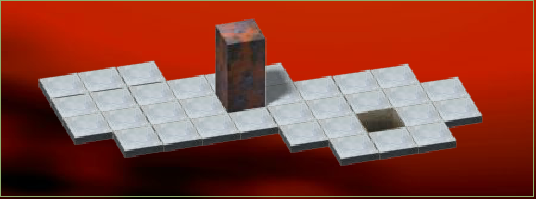
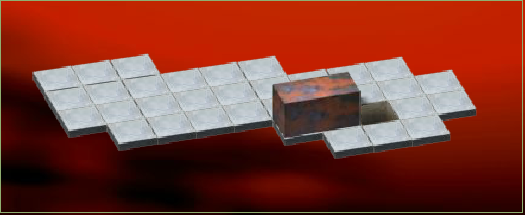
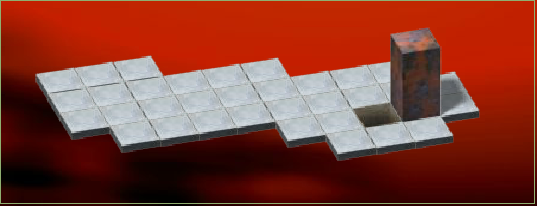
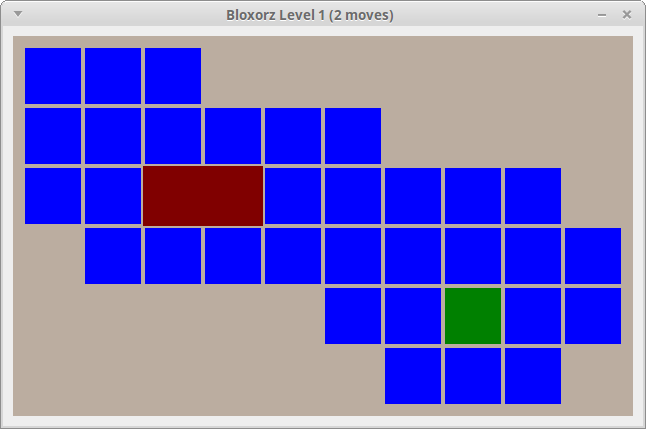
Before you panic: We will implement a simpler graphical user interface. In our implementation, the same level (level 1) will look like this (after a right and a down move):
The Block class
We start by implementing a class to represent the rolling block. Here are the methods of this class (and a small data class for positions on the terrain):
data class Pos(val x: Int, val y: Int) {
  fun dx(d: Int): Pos = Pos(x + d, y)
  fun dy(d: Int): Pos = Pos(x, y + d)
}

class Block(p: Pos) {
  override fun toString(): String
  fun positions(): List<Pos>
  fun isStanding(): Boolean
  fun left(): Unit
  fun right(): Unit
  fun up(): Unit
  fun down(): Unit
}
When we create a Block object, it always starts standing at position p. Test your Block carefully after compiling the Block object. Note that positions returns the list of positions occupied by the block: one position when it is standing, two positions when it is lying.
$ ktc
Welcome to Kotlin version 1.0.4 (JRE 1.8.0_91)
Type :help for help, :quit for quit
>>> val b = Block(Pos(3, 4))
>>> b
Block{Pos(x=3, y=4)}
>>> b.right()
>>> b
Block{Pos(x=4, y=4),Pos(x=5, y=4)}
>>> b.isStanding()
false
>>> b.right()
>>> b
Block{Pos(x=6, y=4)}
>>> b.isStanding()
true
>>> b.positions()
[Pos(x=6, y=4)]
>>> b.down()
>>> b
Block{Pos(x=6, y=5),Pos(x=6, y=6)}
>>> b.positions()
[Pos(x=6, y=5), Pos(x=6, y=6)]
>>> b.isStanding()
false
>>> b.right()
>>> b
Block{Pos(x=7, y=5),Pos(x=7, y=6)}
>>> b.right()
>>> b
Block{Pos(x=8, y=5),Pos(x=8, y=6)}
>>> b.down()
>>> b
Block{Pos(x=8, y=7)}
>>> b.isStanding()
true
The Terrain class
Download a zip-file with nine Bloxorz levels here.
We need a class Terrain to store a level. Here are the public methods of this class:
class Terrain(fname: String) {
  fun start(): Pos
  fun target(): Pos
  fun width(): Int
  fun height(): Int
  fun at(p: Pos): Int
  fun canHold(b: Block): Boolean
}
When a Terrain object is constructed, it reads the terrain data from a file. The file for level 1 (the same as on the screenshots above) looks like this:
ooo
oSoooo
ooooooooo
-ooooooooo
-----ooToo
------ooo
Each character corresponds to a tile position. The first line has \(y\)-coordinate zero, and the \(y\)-coordinate increases from top to bottom. In each line, the first character has \(x\)-coordinate zero.
A "o" character indicates a tile, while a "-" means that there is no tile at this position. The "S" indicates the start position, in this case at position \((1,1)\), the "T" indicates the target position (at \((7,4)\) in this level).
There is only one more character we will need, namely the period ".". It first appears in level 4:
---.......
---.......
oooo-----ooo
ooo-------oo
ooo-------oo
oSo--oooo.....
ooo--oooo.....
-----oTo--..o.
-----ooo--....
The period indicates a light tile. This is a tile on which the block can lie, but not stand. If you try to put the block upright on a light tile, the tile breaks and the block falls off the terrain.
Note that Terrain is immutable: It cannot be changed in any way after it has been constructed. The methods start and target return the position of the start and target. The methods width and height return the dimensions of the terrain. This is determined automatically from the level file.
Your implementation of Terrain should store the terrain as a map, which maps positions to something useful. This allows you to construct the map in one go as you read through the file.
The method at(p: Pos) checks what is in the terrain at position p. It returns 2 for a normal tile (including the start and target tile), 1 for a light tile, and 0 if there is no tile at that position.
Finally, canHold(b: Block) checks if the block b safely rests on the terrain.
Here are some example tests using level 1:
$ ktc
Welcome to Kotlin version 1.0.4 (JRE 1.8.0_91-8u91-b14-3ubuntu1~16.04.1-b14)
Type :help for help, :quit for quit
>>> val t = Terrain("terrains/level01.txt")
>>> t.width()
10
>>> t.height()
6
>>> t.start()
Pos(x=1, y=1)
>>> t.target()
Pos(x=7, y=4)
>>> t.at(Pos(2,1))
2
>>> val b = Block(Pos(4,1))
>>> b
Block{Pos(x=4, y=1)}
>>> t.canHold(b)
true
>>> b.right()
>>> b
Block{Pos(x=5, y=1),Pos(x=6, y=1)}
>>> t.canHold(b)
false
>>> t.at(Pos(5,1))
2
>>> t.at(Pos(6,1))
0
Note that b falls off the terrain even though half of it is on
a tile—that is not enough.
The game object
Now it's time to implement the game itself. The main function calls a function playLevel for each level, advancing to the next level when that returns. I'm providing a method tileSize to compute a suitable size for the game tiles, and the method playLevel:
fun tileSize(t: Terrain): Int {
  var ts = 60
  while (ts > 5) {
    if (t.width() * ts <= 800 && t.height() * ts <= 640)
      return ts
    ts -= 2
  }
  return ts
}

fun playLevel(level: Int) {
  val terrain = Terrain("terrains/level%02d.txt".format(level))
  val ts = tileSize(terrain)
  val image = BufferedImage(ts * terrain.width() + 20,
                            ts * terrain.height() + 20,
                            BufferedImage.TYPE_INT_RGB)
  val canvas = ImageCanvas(image)
  var block = Block(terrain.start())
  var moves = 0

  while (true) {
    setTitle("Bloxorz Level $level ($moves moves)")
    draw(canvas, terrain, ts.toDouble(), block)
    show(image)
    val ch = waitKey()
    if (ch in "lurd") {
      makeMove(block, ch)
      moves += 1
    }
    if (block.isStanding() && block.positions().first() == terrain.target()) {
      showMessage("Congratulations, you solved level $level")
      return
    }
    if (!terrain.canHold(block)) {
      showMessage("You fell off the terrain")
      block = Block(terrain.start())
    }
  }
}
Note that I'm creating a new canvas in each level, because the size of the window changes depending on the size of the terrain.
It remains for you to implement the draw method, which draws the terrain and the block onto the canvas, and the simple method makeMove that executes one move depending on the character pressed. Note that when you fall off the terrain, your block returns to the start position, but the move counter continues counting!
Bonus task 1
If you play the game here, you will find that it has some features that do not exist in our version. In particular, there are bridges that can be turned on and off using switches. Implement these bridges.
You will first need an extension to our file format. We will use the upper case letters "A" to "Z" for switches (with the exception of "S" and "T" which are already used for start and target), and the lower case letters "a" to "z" for bridges (with the exception of "o" which is a normal tile).
For example, here is the level file level02.txt for Level 2 (level02.txt):
------oooo--ooo
oooo--ooBo--oTo
ooAo--oooo--ooo
oooo--oooo--ooo
oSooaaoooobbooo
oooo--oooo
#AOa
#BXb
The two last lines here start with a "#" sign. Each such line defines the behavior of a switch.
For instance, the line
#CXhstates that switch "C" is a "heavy switch" (the block needs to stand on it to activate it) and it toggles bridge "h" on and off.
The line
#COhindicates that "C" is a "soft switch" (it's enough for part of the block to rest on the switch to activate it), and again it toggles bridge "h".
The lines
#AO+h
#BO-h
indicate that "A" and "B" are both soft switches, where "A" turns on bridge "h" while "B" turns off bridge "h".
Finally, a line starting with "%" defines the starting state of a bridge. For instance, the line
%hstates that bridge "h" is on when we start the level. (If no such line is present the bridge is off.)
You can find all the levels I have already entered on github. If you create more levels, please mail them to me so I can add them here.
Bonus task 2
Implement a three-dimensional display as in the first screenshots above. Don't worry about shading or shadows. We use an orthogonal camera, and so each tile has the same quadrilateral shape. If you draw the block after the tiles, then it will automatically appear on top of the terrain.
Bonus task 3
Implement a solver in your Bloxorz game. It should use a graph search (for instance, BFS) to find a sequence of moves to the target position. When the user presses the Enter key, the block automatically moves one stop closer to the target. If the user keeps pressing the Enter key, she will see the puzzle being solved automatically.
Bonus task 4
The online game has one more type of switch that splits the block into two smaller cubes that can be controlled individually. level08.txt contains such a switch. It is defined by the line:
#AS 10 1 10 7The numbers indicate the coordinates \((10,1)\) and \((10,7)\) where the two smaller blocks will appear.
Implement this feature.
 |  |  | Bloxorz |